
 Sign In

 Shop
Shop

 Academy
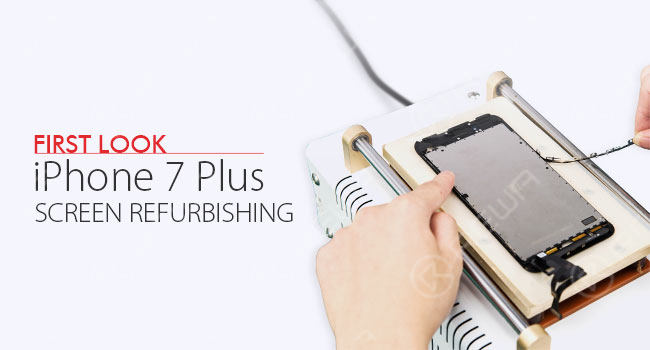
iPhone 7 Plus Broken Screen Refurbishing - First Look
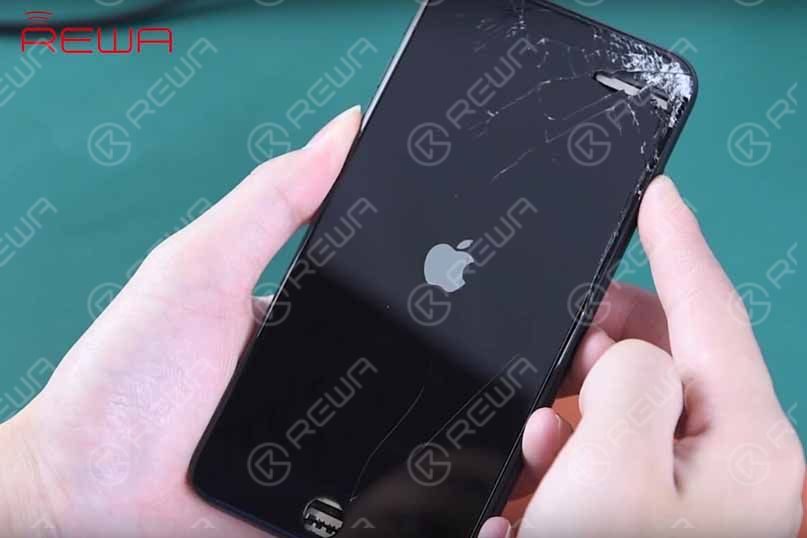
iPhone 7 and 7 Plus have been released for more than 20 days. How will you deal with your broken iPhone 7 or 7 Plus? Actually, we have already published several posts concerning LCD refurbishing guidance for some flagship models of Apple and Samsung. But now you are getting the chance to take a sneak peek at the latest broken LCD refurbishing techniques and tricks. Absolutely, it is for the newest model of Apple - iPhone 7 Plus.
This refurbishing process will involve some of the recommended refurbishing machines of stable performance and easy-to-use merits as well as repair materials and tools . Let’s enjoy the main course now, step by step. Broken Screen Testing Firstly, you need an iPhone 7 Plus LCD with broken glass lens but properly working touch screen and LCD display. Install LCD to motherboard plate, then test if the display, touch and 3D touch functionality is OK.
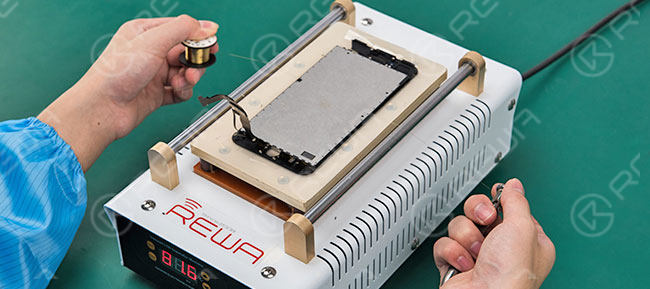
Bezel Disassembling Take off the LCD screen from the phone, cut the 4 corners of the front bezel with Heating Soldering Iron. Stick adhesive tape on the whole glass lens to prevent the problems that may arise in subsequent operations. Lay the LCD on Manual LCD Separator (80-90℃) and heat for about 15s. Press the Start button and remove the bezel frame. Remove the bezel adhesive glue with razor blade afterward. 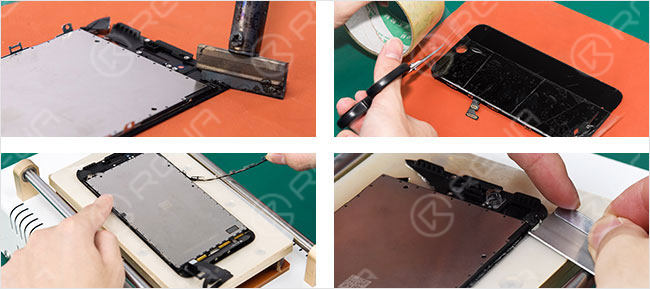
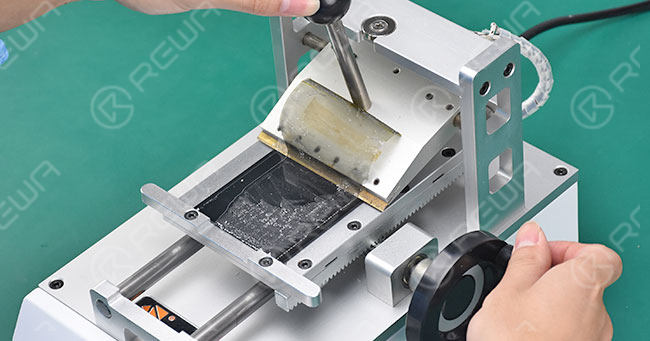
Glass Separating
Embed the gold cutting wire into the bottom of LCD screen, pull it right and left till the glass separated.
POL Film Removing
Turn on LCD Glue Removing Machine and preheat for 5 minutes(170-180℃), then remove the POL film.
Glue Removing
Brush some LCM Cleaner on LCD and remove the residue adhesive. Eliminate the residue completely with N-hexane.
POL Film Laminating
Put the LCD on POL Film / OCA Laminating Machine and align it with a new piece of POL Film. Press Pump Down button, absorb it on the panel. Clean the LCD again and tear off the protective film with Easy Tear Sticker. Press Membrana Tectoria(Laminating) button to start POL Film Laminating.
OCA Glue Laminating
Tear off the first protective film and align OCA glue with LCD. Press the Pump Down button to absorb OCA glue. Tear off the protective film with Easy Tear Sticker and then go into the OCA Glue Laminating.
Glass Laminating
Put the LCD into align mold and tear off the OCA protective film. Align the LCD with Integrated Glass Lens and Bezel Frame. Tear off the glass lens protective film. Lay LCD into the laminating mold, then put it into 4 in 1 Vacuum Glass Laminating and Bubble Removing Machine. Press Start button and start glass laminating. Take it out after glass laminating is done(about the 30s at 42℃).
Bubble Removing
Lay LCD onto the Iron Shelf, close the cabin door and press Start Button. After bubble removing finishes(about 10 minutes at 35℃), press the button again and wait till the gauge indicates 0. At this moment open the door and take out the LCD screen.
Back Light Unit Replacing
Remove the soldering spot adhesive with tweezers. Detach the soldering joint with Soldering Iron. Put the LCD on Heating Platform for 20-30s, then tear off the backlight unit layer by layer. Remove the adhesive glue. Clean the LCD with N-hexane, tear off the protective film on Back Light Unit . Align it with LCD screen, then weld the soldering joint with solder wire(ensure that the tin spot is of satiation). Stick a new soldering spot adhesive on the joint.
Retesting
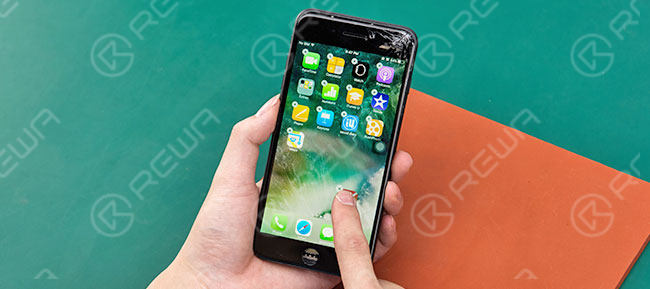
Connect the LCD to the motherboard, and then test the display, 3D touch and touch functionality again.
Note: 1 Back Light Unit needs replacing only when it has problems of water damage, dust spot, light spot and 3D touch fails etc.2. The use of Integrated Glass Lens with Bezel Frame results in the unnecessity of Bezel Assembling step in this refurbishing process.
This is when we should call it a day. Because at this point a cracked iPhone 7 Plus is successfully refurbished. If you are looking for LCD refurbish machine, materials, demo videos and technical support, please feel free to contact us at info@rewatechnology.com or visit the online shop at shop.rewa.tech , or else watch the following video in our exclusive YouTube Channel.
Want to order our products? Please contact us: PRE-SALES Skype: rewatech Email: service@rewa.tech AFTER-SALES Skype: support-rewatech Email: support@rewatechnology.com And you can also check our repair guides: REWA Screen Repair:
Samsung Galaxy S7 edge glass replacement ,
iPhone 7 touch screen not working ,
iPad Air Touch Screen Partially Unresponsive Repair ,
iPhone X Screen Refurbishing – Glass Only Repair ,
iPhone 8 Broken LCD Screen Refurbishing,
REWA Motherboard Repair:
How to fix water damaged iPhone 6 ,
0
0


No Comments
0
0
Share
Apr 23, 2021
ABOUT REWA
REWA is a world leading electronics repair business solutions provider who was founded in 2008 in HongKong. We are committed to delivering one-stop services covering Sourcing Solution, Technical Support Solution as well as Recycle & Resell Solution.


